
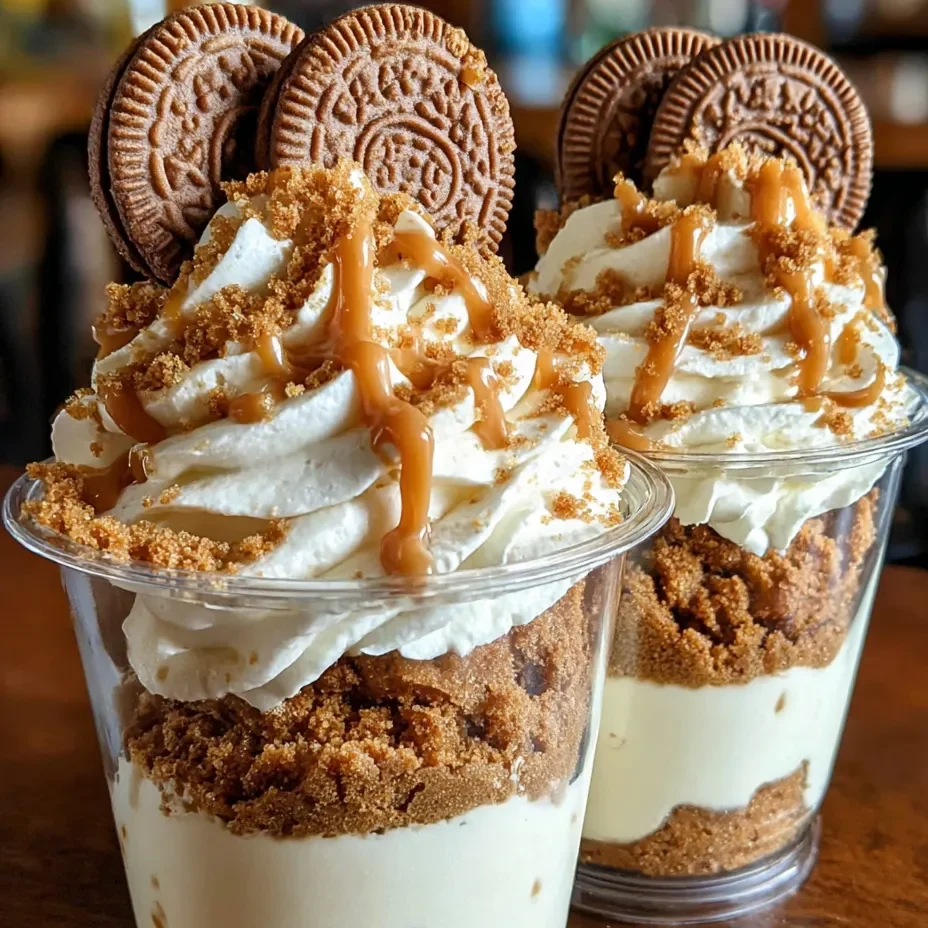
Okay, so imagine if Biscoff cookies and cheesecake had a baby, and that baby decided to show up in individual portions looking like it belongs in a dessert case at some trendy bakery. That’s what we’re dealing with here. Cookie Butter Cheesecake Cups are basically layers of crushed cookie crust, silky no-bake cheesecake filling loaded with cookie butter (Biscoff spread, Speculoos, whatever you call it), more cookie crumbles, topped with a mountain of whipped cream and a whole cookie on top like a little flag of deliciousness. They’re served in clear cups so you can see all those gorgeous layers, which means they look as good as they taste. I made these for a dinner party once and people literally took photos before eating them. Then they ate them in complete silence, which is the highest compliment possible. One person asked if I was secretly running a dessert business. I’m not, but after making these, I considered it.
Why You’ll Love This Recipe
No-bake perfection. Your oven gets the day off. Everything happens in bowls and gets assembled.
Those layers though. Every spoonful has crust, cream, and cookie. It’s architectural and delicious.
Portion control built-in. Individual servings mean nobody’s fighting over who got the bigger slice. Democracy in dessert form.
Cookie butter is life. If you’ve never had cookie butter, prepare for your life to change. If you have, you already know why this recipe exists.
Make-ahead champion. These actually need time to chill, so making them ahead is required. Future you is grateful.
Looks bakery-fancy. Clear cups, perfect layers, whipped cream swirls. Instagram is shaking.
The Good Stuff You’ll Need
For the Cookie Crust:
- 2 cups Biscoff cookies (or any speculoos/ginger cookies), crushed into fine crumbs
- 5 tbsp unsalted butter, melted
- 2 tbsp brown sugar
- Pinch of salt
For the Cheesecake Filling:
- 16 oz (two blocks) cream cheese, softened to room temp (seriously, don’t skip this)
- 1/2 cup granulated sugar
- 1 cup cookie butter (Biscoff spread or Speculoos—smooth, not crunchy)
- 1 tsp vanilla extract
- 1/4 tsp cinnamon (optional but recommended)
- 1 cup heavy whipping cream, cold
- 1/4 cup powdered sugar
For Topping:
- 1 1/2 cups heavy whipping cream, cold
- 3 tbsp powdered sugar
- 1 tsp vanilla extract
- Extra cookie crumbs for sprinkling
- Whole Biscoff cookies for garnish
- Caramel sauce for drizzling (optional but fancy)
Equipment:
- 6-8 clear cups or jars (8-10 oz size)
- Electric mixer or stand mixer
- Piping bag with star tip (or ziplock bag with corner cut off)
Let’s Do This
Step 1: Make the Cookie Crust
Crush your Biscoff cookies into fine crumbs. You can use a food processor, put them in a ziplock bag and smash with a rolling pin, or just use your hands and some aggression. Therapy is expensive; crushing cookies is free.
Mix cookie crumbs with melted butter, brown sugar, and salt until it looks like wet sand.
Press about 2-3 tablespoons of the mixture into the bottom of each cup. Use the back of a spoon or a small glass to really pack it down.
Reserve some crumbs for layering later. Don’t use it all at the bottom or you’ll be sad.
Pop the cups in the freezer while you make the filling. This helps the crust set.
Step 2: Make the Cheesecake Magic
In a large bowl (or stand mixer), beat softened cream cheese on medium-high speed for 2-3 minutes until fluffy and smooth. No lumps, no mercy.
Add granulated sugar and beat for another 2 minutes until light and creamy.
Add cookie butter, vanilla, and cinnamon. Beat until completely combined and silky smooth. Taste it. Try not to eat it all with a spoon. This is hard, I know.
In a separate bowl, whip the cold heavy cream with powdered sugar until stiff peaks form. Don’t overbeat or you’ll have butter.
Gently fold the whipped cream into the cream cheese mixture in three additions. Be gentle—you want to keep all that airiness. This creates a light, mousse-like texture.
Step 3: Assemble Like a Boss
Remove cups from freezer.
Spoon or pipe a layer of cheesecake filling over the cookie crust in each cup, filling them about halfway.
Sprinkle a layer of reserved cookie crumbs over the cheesecake layer.
Add another layer of cheesecake filling on top, leaving about an inch of space at the top for whipped cream.
Cover with plastic wrap and refrigerate for at least 4 hours, preferably overnight. The filling needs time to set and the flavors to meld.
Step 4: Top It Off
Right before serving, make the whipped cream topping.
Beat cold heavy cream with powdered sugar and vanilla on medium-high speed until stiff peaks form.
Transfer to a piping bag fitted with a star tip (or use a ziplock bag with the corner cut off).
Pipe generous swirls of whipped cream on top of each cup. Go big or go home.
Sprinkle with extra cookie crumbs.
Stick a whole Biscoff cookie into the whipped cream like a little flag.
Drizzle with caramel sauce if you’re feeling extra fancy.
Step 5: Serve and Accept Praise
Serve immediately after topping with whipped cream.
Hand out spoons and watch people lose their minds.
Try not to make smug faces when people ask where you bought these.
Serving Suggestions
These are basically a complete dessert experience, but if you want to gild the lily:
- Drizzle with salted caramel sauce between layers
- Add a shot of espresso on the side for an affogato-style dessert
- Serve with extra cookies for dunking in the leftover cream
- Top with a sprinkle of flaky sea salt for sweet-salty vibes
- Add a small scoop of vanilla ice cream on top because why not
Switch It Up
Chocolate Lover Version: Add 1/4 cup cocoa powder to the cheesecake filling and use chocolate cookies for the crust.
Peanut Butter Swap: Use peanut butter instead of cookie butter for a PB cheesecake cup situation.
Nutella Dream: Replace cookie butter with Nutella and use chocolate graham crackers for the crust.
Salted Caramel: Swirl salted caramel sauce into the cheesecake filling before layering.
Boozy Adult Version: Add 2 tbsp of bourbon or rum to the cheesecake filling. Very sophisticated.
Mini Versions: Use shot glasses or small mason jars for bite-sized portions. Perfect for parties.
Oreo Style: Use crushed Oreos for the crust and add crushed Oreos to the filling. Cookie inception.
Make-Ahead Tips
This is literally a make-ahead dessert. It HAS to chill for hours.
Make the entire dessert (without whipped cream topping) up to 2 days ahead. Store covered in the refrigerator.
The cookie crust can be pressed into cups and frozen for up to a week before assembling.
Make the cheesecake filling a day ahead and store covered in the fridge. Assemble the cups the next day.
Add the whipped cream topping no more than 2-3 hours before serving. It starts to deflate and get watery after that.
Don’t freeze these—the texture gets weird when thawed. Just make them 1-2 days ahead and keep refrigerated.
Why This Works So Damn Well
Cookie Butter Cheesecake Cups work because they’re essentially a deconstructed cheesecake that’s been optimized for maximum flavor and ease. The no-bake filling is lightened with whipped cream, creating a mousse-like texture that’s less dense than traditional cheesecake but still rich and satisfying. The cookie butter adds that distinctive spiced, caramelized flavor that makes Biscoff cookies so addictive.
The layering isn’t just for looks—it ensures you get crust, cream, and cookie in every bite. The cookie crumb layer in the middle adds texture and an extra hit of that cookie butter flavor. The whipped cream on top provides contrast and lightness. The whole cookie garnish is functional—you can use it as a spoon or just eat it.
Using clear cups is strategic. You can see those gorgeous layers, which makes them feel special and bakery-worthy. The individual portions mean consistent serving sizes and no messy slicing. They’re easy to transport, easy to serve, and easy to eat.
The magic is in the ratios. Enough crust for structure, enough filling to be indulgent, enough whipped cream to feel light. It’s perfectly balanced between rich and refreshing, sweet and sophisticated.
When to Make These
Dinner Party Dessert: These look impressive and can be made ahead. Perfect host move.
Holiday Gatherings: Thanksgiving, Christmas, New Year’s—these fit right in with the festive vibes.
Birthday Alternative: For people who don’t want cake but still want something special.
Potluck Champion: Easy to transport, individual portions, looks amazing. You’ll be the star.
Date Night At Home: Make these together or surprise your partner. Romantic and delicious.
Just Because: Sometimes you need individual cheesecake cups in your life and that’s valid.
Questions People Actually Ask
Q: Can I use crunchy cookie butter instead of smooth? A: You can, but the texture will be a bit grainy. Smooth works better for that silky cheesecake filling.
Q: My cream cheese has lumps. What do I do? A: Your cream cheese wasn’t soft enough. Let it sit at room temp for at least an hour, or microwave for 10 seconds and beat again.
Q: Can I make these in a large trifle bowl instead of individual cups? A: Absolutely! Layer everything in a large glass bowl or trifle dish. Same concept, different presentation.
Q: The filling is too soft and won’t set. Help! A: You either didn’t whip the cream to stiff peaks, or you overmixed when folding it in and deflated it. Pop it in the freezer for 30 minutes to firm up.
Q: Can I skip the whipped cream topping? A: You can, but it won’t look as pretty and you’ll miss that light, fluffy contrast to the rich filling.
Q: Where do I find cookie butter? A: Most grocery stores carry it near the peanut butter. Trader Joe’s has Speculoos cookie butter, and Biscoff spread is widely available.
Q: Can I use store-bought whipped cream? A: For the topping, yes (though homemade is better). For folding into the filling, use real whipped cream—Cool Whip won’t hold up the same way.
Print
Cookie Butter Cheesecake Cups
- Total Time: 30 minutes
- Yield: 6–8 cups 1x
Description
Okay, so imagine if Biscoff cookies and cheesecake had a baby, and that baby decided to show up in individual portions looking like it belongs in a dessert case at some trendy bakery. That’s what we’re dealing with here. Cookie Butter Cheesecake Cups are basically layers of crushed cookie crust, silky no-bake cheesecake filling loaded with cookie butter (Biscoff spread, Speculoos, whatever you call it), more cookie crumbles, topped with a mountain of whipped cream and a whole cookie on top like a little flag of deliciousness. They’re served in clear cups so you can see all those gorgeous layers, which means they look as good as they taste. I made these for a dinner party once and people literally took photos before eating them. Then they ate them in complete silence, which is the highest compliment possible. One person asked if I was secretly running a dessert business. I’m not, but after making these, I considered it.
Ingredients
For the Cookie Crust:
- 2 cups Biscoff cookies (or any speculoos/ginger cookies), crushed into fine crumbs
- 5 tbsp unsalted butter, melted
- 2 tbsp brown sugar
- Pinch of salt
For the Cheesecake Filling:
- 16 oz (two blocks) cream cheese, softened to room temp (seriously, don’t skip this)
- 1/2 cup granulated sugar
- 1 cup cookie butter (Biscoff spread or Speculoos—smooth, not crunchy)
- 1 tsp vanilla extract
- 1/4 tsp cinnamon (optional but recommended)
- 1 cup heavy whipping cream, cold
- 1/4 cup powdered sugar
For Topping:
- 1 1/2 cups heavy whipping cream, cold
- 3 tbsp powdered sugar
- 1 tsp vanilla extract
- Extra cookie crumbs for sprinkling
- Whole Biscoff cookies for garnish
- Caramel sauce for drizzling (optional but fancy)
Equipment:
- 6–8 clear cups or jars (8–10 oz size)
- Electric mixer or stand mixer
- Piping bag with star tip (or ziplock bag with corner cut off)
Instructions
Step 1: Make the Cookie Crust
Crush your Biscoff cookies into fine crumbs. You can use a food processor, put them in a ziplock bag and smash with a rolling pin, or just use your hands and some aggression. Therapy is expensive; crushing cookies is free.
Mix cookie crumbs with melted butter, brown sugar, and salt until it looks like wet sand.
Press about 2-3 tablespoons of the mixture into the bottom of each cup. Use the back of a spoon or a small glass to really pack it down.
Reserve some crumbs for layering later. Don’t use it all at the bottom or you’ll be sad.
Pop the cups in the freezer while you make the filling. This helps the crust set.
Step 2: Make the Cheesecake Magic
In a large bowl (or stand mixer), beat softened cream cheese on medium-high speed for 2-3 minutes until fluffy and smooth. No lumps, no mercy.
Add granulated sugar and beat for another 2 minutes until light and creamy.
Add cookie butter, vanilla, and cinnamon. Beat until completely combined and silky smooth. Taste it. Try not to eat it all with a spoon. This is hard, I know.
In a separate bowl, whip the cold heavy cream with powdered sugar until stiff peaks form. Don’t overbeat or you’ll have butter.
Gently fold the whipped cream into the cream cheese mixture in three additions. Be gentle—you want to keep all that airiness. This creates a light, mousse-like texture.
Step 3: Assemble Like a Boss
Remove cups from freezer.
Spoon or pipe a layer of cheesecake filling over the cookie crust in each cup, filling them about halfway.
Sprinkle a layer of reserved cookie crumbs over the cheesecake layer.
Add another layer of cheesecake filling on top, leaving about an inch of space at the top for whipped cream.
Cover with plastic wrap and refrigerate for at least 4 hours, preferably overnight. The filling needs time to set and the flavors to meld.
Step 4: Top It Off
Right before serving, make the whipped cream topping.
Beat cold heavy cream with powdered sugar and vanilla on medium-high speed until stiff peaks form.
Transfer to a piping bag fitted with a star tip (or use a ziplock bag with the corner cut off).
Pipe generous swirls of whipped cream on top of each cup. Go big or go home.
Sprinkle with extra cookie crumbs.
Stick a whole Biscoff cookie into the whipped cream like a little flag.
Drizzle with caramel sauce if you’re feeling extra fancy.
Step 5: Serve and Accept Praise
Serve immediately after topping with whipped cream.
Hand out spoons and watch people lose their minds.
Try not to make smug faces when people ask where you bought these.
Notes
These are basically a complete dessert experience, but if you want to gild the lily:
- Drizzle with salted caramel sauce between layers
- Add a shot of espresso on the side for an affogato-style dessert
- Serve with extra cookies for dunking in the leftover cream
- Top with a sprinkle of flaky sea salt for sweet-salty vibes
- Add a small scoop of vanilla ice cream on top because why not
- Prep Time: 30 minutes
Nutrition
- Calories: ~485 kcal
- Fat: ~34g
- Carbohydrates: ~42g
- Protein: ~6g


