
Someone figured out that cookies don’t have to spread into thin, crispy discs. They can be THICK. They can be soft and chewy in the middle with crispy edges. They can have pools of melted chocolate chunks that ooze when you bite into them. And once you experience a truly thick chocolate chunk cookie, there’s no going back to those sad, flat wannabes. This is cookie enlightenment in edible form.
These aren’t those cookies that look promising in the oven and then deflate into disappointment. These are cookies that rise up, stay up, and deliver on every promise they make. They’re thick enough to have textural contrast – crispy golden edges, soft chewy centers, and chunks of chocolate that are actual chunks, not polite little chips. The secret is in the technique, the temperature, and refusing to apologize for excess.
This is “I’m never buying store-bought cookies again” energy. It’s what happens when you treat cookies with the respect they deserve. It’s proof that thickness isn’t just a physical attribute – it’s a lifestyle choice.
Why These Cookies Are About to Ruin All Other Cookies For You
- Actually thick — Not “slightly puffy” thick, but legitimately THICK
- Soft and chewy centers — With those crispy edges everyone fights over
- Chocolate chunks, not chips — Big pieces that create molten chocolate pockets
- Bakery-style — The kind you’d pay $4 each for, but you’re making them
- Perfect texture contrast — Every bite has multiple textures happening
- Consistent results — They come out thick every single time
The Stuff You Need
For the Cookies:
- 2¼ cups all-purpose flour
- 1 teaspoon baking soda
- 1 teaspoon salt (yes, a full teaspoon)
- 1 cup (2 sticks) unsalted butter, melted and slightly cooled
- 1 cup packed light brown sugar
- ½ cup granulated sugar
- 2 large eggs, room temperature
- 2 teaspoons vanilla extract
- 2 cups chocolate chunks (not chips – buy a chocolate bar and chop it)
- Optional: flaky sea salt for topping
Special Equipment:
- Stand mixer or hand mixer
- Baking sheets
- Parchment paper or silicone mats
- Cookie scoop (3 tablespoon size for standard cookies)
- Sharp knife for chopping chocolate
Let’s Make These Cookies That’ll Change Your Life
Step 1: The Chocolate Chunk Prep
First things first – if you’re using chocolate chips, stop. Go buy a good quality chocolate bar (or three). Dark chocolate, milk chocolate, semi-sweet – whatever you prefer, but it needs to be bar chocolate. Chop it into rough chunks, varying sizes from pea-sized to almond-sized. The irregular pieces create different melting patterns and pockets of molten chocolate. This is non-negotiable for bakery-style cookies.
Step 2: The Dry Mix
In a medium bowl, whisk together flour, baking soda, and salt. Whisk it well – you want the leavening and salt evenly distributed. Set this aside. This is the boring but necessary step.
Step 3: The Butter Situation
Melt your butter and let it cool for about 5 minutes. It should be melted but not hot – if it’s too hot, it’ll cook the eggs when you add them. Slightly warm or room temp melted butter is perfect. This is crucial for getting that thick, chewy texture. Cold butter makes cakey cookies. Melted butter makes chewy, dense cookies.
Step 4: The Sugar and Butter Marriage
In a large bowl (or your stand mixer bowl), combine the melted butter with both sugars. Mix on medium speed for about 2 minutes until it’s well combined and slightly lighter in color. It won’t get fluffy like creamed butter and sugar – that’s normal. You’re creating a smooth, thick mixture. The brown sugar is what gives these cookies their chewiness and that deep, caramel-like flavor.
Step 5: The Eggs and Vanilla
Add eggs one at a time, beating well after each addition. Add the vanilla extract. Mix until everything is completely incorporated and the mixture is smooth and glossy. It should look almost like caramel at this point. If you see any streaks of egg, keep mixing.
Step 6: The Flour Addition (Don’t Screw This Up)
Add your dry ingredients all at once. Mix on LOW speed just until you don’t see any more flour streaks. DO NOT OVERMIX. The second you don’t see flour, stop. Overmixing develops gluten, which makes tough, cakey cookies instead of tender, chewy ones. If you have a few small flour streaks, that’s better than overmixing. They’ll incorporate when you add the chocolate.
Step 7: The Chocolate Chunk Integration
Add your chopped chocolate chunks. Fold them in with a spatula or mix on the lowest speed for just a few seconds. You want them evenly distributed but you’re not trying to pulverize them. Some will be on the surface – that’s perfect. Those surface chunks will create those gorgeous chocolate pools on top.
Step 8: The Chill (Most Important Step)
This is where most people mess up. Cover the dough and refrigerate for AT LEAST 2 hours, preferably overnight. This isn’t optional if you want thick cookies. Chilling the dough does several things: it solidifies the fat so the cookies don’t spread immediately, it allows the flour to fully hydrate, and it lets the flavors develop. Room temperature cookie dough = flat cookies. Cold cookie dough = thick cookies. Science.
Step 9: The Oven Prep
When you’re ready to bake, preheat your oven to 350°F (or 325°F if you have a convection oven). Line your baking sheets with parchment paper. Don’t skip the parchment – it prevents sticking and makes cleanup easy.
Step 10: The Portioning
Use a 3-tablespoon cookie scoop (or measure out about 3 tablespoons of dough per cookie). The dough will be firm from chilling – that’s perfect. Roll each portion into a ball, then here’s the key: slightly flatten the top while keeping the sides tall. You want a hockey puck shape, not a perfect sphere. This helps them bake up tall instead of round.
Step 11: The Spacing
Place 6 cookies per standard baking sheet. These spread, but not a ton. Still, give them room. If you crowd them, they’ll bake into one mega-cookie, and while that sounds fun, it’s actually disappointing.
Step 12: The Baking Process
Bake for 12-14 minutes. They should be golden brown around the edges but still look slightly underdone in the center. They’ll look puffy and soft. DO NOT OVERBAKE. Overbaked cookies are the enemy of thickness. The centers should look barely set – they’ll continue cooking on the hot pan after you remove them from the oven.
Step 13: The Pan Rest
When you remove the cookies from the oven, let them sit on the baking sheet for 5 minutes. This is crucial. They need to set up before you move them or they’ll fall apart. After 5 minutes, transfer them to a cooling rack. They’ll firm up as they cool but should stay soft and chewy in the middle.
Step 14: The Salt Situation (Optional But Amazing)
While the cookies are still warm, sprinkle a tiny pinch of flaky sea salt on top of each one. The salt enhances the sweetness and the chocolate flavor. It’s the difference between good cookies and cookies that make people ask for the recipe.
Step 15: The Eating
Wait until they’re warm but not hot – about 10 minutes out of the oven. Pick one up and notice the thickness. Break it in half and see that soft, chewy interior with melted chocolate chunks. Take a bite and experience the textural contrast – crispy edges, soft center, molten chocolate. This is what cookies are supposed to be.
Pro Tips From Someone Who’s Made A Thousand Batches
Chill the Dough, Seriously: I can’t stress this enough. Room temp dough = flat cookies. Every time. No exceptions.
Use Brown Sugar: The molasses in brown sugar creates chewiness. Don’t substitute all white sugar unless you want crispy cookies.
Chocolate Chunks, Not Chips: Chips have stabilizers that prevent melting. Chopped bar chocolate melts into beautiful pools.
Don’t Overbake: They should look slightly underdone when you pull them out. Trust the process.
Room Temperature Eggs: Cold eggs don’t incorporate as well. Let them sit out for 30 minutes before using.
Measure Flour Correctly: Spoon flour into your measuring cup and level it off. Scooping directly from the bag compacts it and you’ll use too much, making dry cookies.
Rotate the Pan: Halfway through baking, rotate your pan 180 degrees for even baking.
Switch It Up (Because Cookie Variety Is Life)
Double Chocolate: Replace ¼ cup flour with cocoa powder. Add white chocolate chunks along with dark chocolate.
Brown Butter Version: Brown the butter before using and let it cool completely. Adds nutty, caramel notes.
Espresso Chocolate: Add 1 tablespoon instant espresso powder to the dough. Coffee enhances chocolate flavor.
Nutty Chunks: Add 1 cup chopped walnuts or pecans along with the chocolate. Texture party.
Sea Salt Caramel: Press a piece of soft caramel into the center of each dough ball before baking. Top with sea salt.
Stuffed Cookies: Wrap cookie dough around a piece of chocolate, peanut butter cup, or Oreo. Bake as directed.
Triple Chocolate: Use a mix of dark, milk, and white chocolate chunks. Maximum chocolate coverage.
Make-Ahead Magic
The Dough: Make dough and refrigerate for up to 3 days, or freeze for up to 3 months. Portion into balls before freezing for easy baking.
Freeze Portioned Dough: Scoop cookie dough balls, freeze on a tray, then transfer to a freezer bag. Bake from frozen, adding 2 minutes to bake time.
Baked Cookies: Store baked cookies in an airtight container for up to 5 days. They stay soft if properly stored.
Par-Bake Method: Bake for 8 minutes, cool completely, freeze. When ready to serve, bake from frozen for 4-5 minutes. Fresh-baked taste anytime.
Storage Real Talk
Room Temperature: In an airtight container for 5-7 days. Add a slice of bread to the container to keep them soft.
Refrigerated: They’ll last longer but will firm up. Let them come to room temp before eating or warm in the microwave for 10 seconds.
Frozen Baked Cookies: Up to 3 months. Thaw at room temp or warm in a 300°F oven for 5 minutes.
The Bread Trick: A slice of white bread in your cookie container keeps them soft by providing moisture. Replace the bread every few days.
Perfect Pairings
Cold Milk: This is the law. Thick cookies need cold milk for dunking.
Hot Coffee: The temperature contrast is perfection. The slight bitterness balances the sweetness.
Vanilla Ice Cream: Make ice cream sandwiches. Life-changing.
Nothing: These cookies need no accompaniment. They’re a complete experience.
More Cookies: Just eat another cookie. No judgment here.
The Science of Thick Cookies
Several factors contribute to thick cookies: melted butter creates a denser dough that doesn’t spread as much as creamed butter. The ratio of brown to white sugar affects spread – brown sugar retains moisture and creates chewiness. Chilling the dough solidifies the fat, which slows spreading in the oven, giving the cookies time to rise before they spread out.
The baking soda creates lift and that slightly crispy exterior. The eggs provide structure and richness. The flour-to-fat ratio is balanced to create a dough that’s thick enough to hold its shape but not so thick it’s dry.
Underbaking slightly means the centers stay soft and chewy while the edges crisp up. The residual heat finishes cooking them on the pan. This is how you get that perfect textural contrast that makes thick cookies superior.
When to Make These Cookies
Weekend Baking: Make the dough on Saturday, bake on Sunday. Perfect lazy weekend project.
Gift Giving: Package these in a box and watch people’s faces light up. Better than store-bought by miles.
Cookie Emergency: Keep frozen dough balls on hand. Bake as needed for instant cookies.
Party Dessert: Make them large and stack them on a platter. They’re impressive and delicious.
Stress Relief: There’s something therapeutic about chopping chocolate and scooping cookie dough.
Tuesday: You don’t need a reason. Make cookies whenever you want.
Why These Work So Damn Well
Thick cookies aren’t just about technique – they’re about understanding what makes a cookie great. It’s the contrast between crispy and soft. It’s the pockets of melted chocolate. It’s the slightly salty, deeply sweet, rich flavor that comes from brown sugar and good chocolate.
These cookies work because every element serves a purpose. The melted butter creates density. The chilling prevents spread. The chocolate chunks create drama. The baking time ensures the perfect texture. Nothing is arbitrary.
They’re also just really satisfying to make and eat. There’s something deeply pleasing about pulling a tray of thick, golden cookies out of the oven. About breaking one open and seeing that soft interior. About sharing them with people and watching their reactions.
This is what happens when you stop accepting mediocre cookies and commit to making them right. When you realize that thickness isn’t just a preference – it’s the correct way to do cookies. When you understand that chocolate chunks are superior to chips and chilling dough is mandatory.
These are cookies that make you understand why people become obsessed with baking. Because when you nail it, there’s nothing better.
Questions People Always Ask
Q: Can I skip the chilling? A: You can, but they’ll spread more and be thinner. If you’re in a rush, chill for at least 30 minutes. But overnight is truly better.
Q: Why are my cookies still flat? A: Your dough wasn’t cold enough, your butter was too hot when mixing, you overmixed, or your oven temperature is off. Use an oven thermometer.
Q: Can I use chocolate chips instead of chunks? A: Yes, but you’ll lose the melted chocolate pool effect. Chips are designed not to melt as much.
Q: My cookies spread too much. What happened? A: Dough wasn’t cold enough, too much butter, not enough flour, or oven temp too low. Make sure you chill thoroughly.
Q: Can I make these smaller or larger? A: Yes. Adjust baking time – smaller cookies take 10-11 minutes, larger ones take 15-16 minutes.
Q: Do I need to use both brown and white sugar? A: For best results, yes. All brown sugar makes very soft cookies that might not hold shape well. All white sugar makes crispier cookies.
Q: Can I use salted butter? A: You can, but reduce the added salt to ½ teaspoon.
Print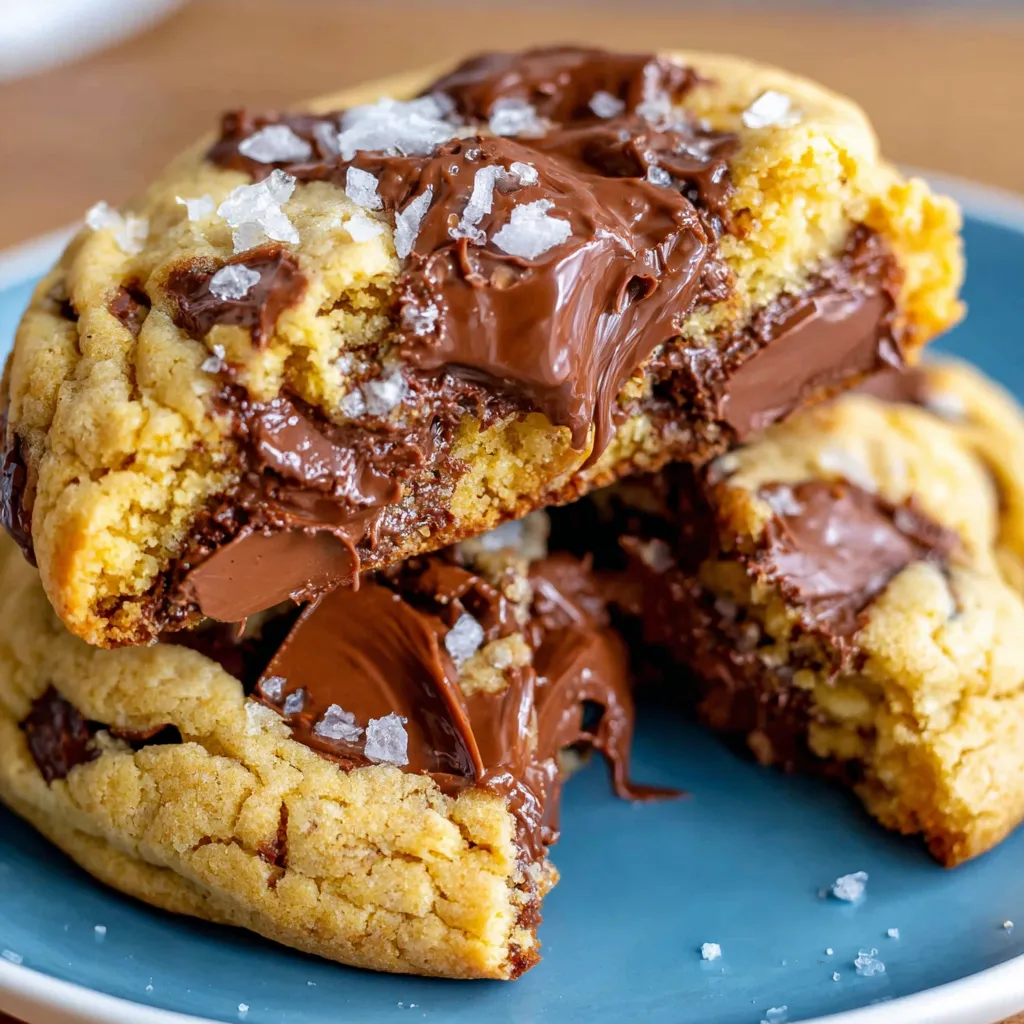
Best Thick Chocolate Chunk Cookies
- Total Time: 0 minute
- Yield: 24 large cookies 1x
Description
Someone figured out that cookies don’t have to spread into thin, crispy discs. They can be THICK. They can be soft and chewy in the middle with crispy edges. They can have pools of melted chocolate chunks that ooze when you bite into them. And once you experience a truly thick chocolate chunk cookie, there’s no going back to those sad, flat wannabes. This is cookie enlightenment in edible form.
These aren’t those cookies that look promising in the oven and then deflate into disappointment. These are cookies that rise up, stay up, and deliver on every promise they make. They’re thick enough to have textural contrast – crispy golden edges, soft chewy centers, and chunks of chocolate that are actual chunks, not polite little chips. The secret is in the technique, the temperature, and refusing to apologize for excess.
This is “I’m never buying store-bought cookies again” energy. It’s what happens when you treat cookies with the respect they deserve. It’s proof that thickness isn’t just a physical attribute – it’s a lifestyle choice.
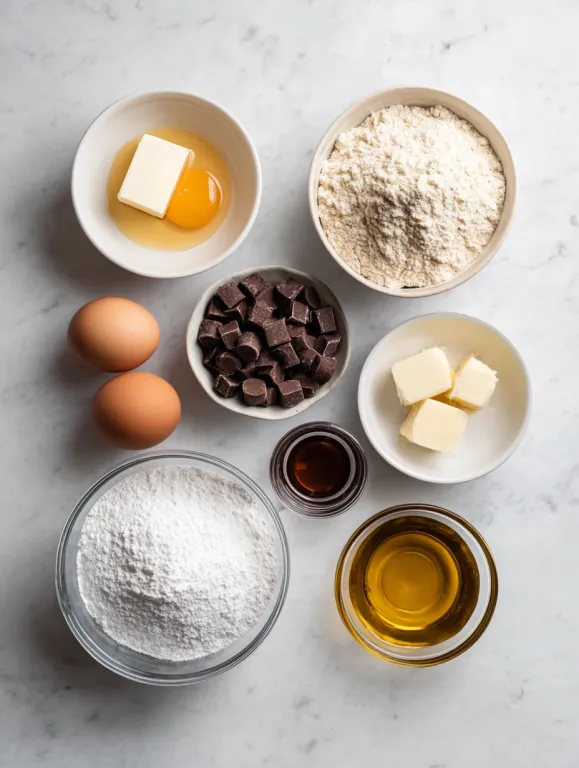
Ingredients
For the Cookies:
- 2¼ cups all-purpose flour
- 1 teaspoon baking soda
- 1 teaspoon salt (yes, a full teaspoon)
- 1 cup (2 sticks) unsalted butter, melted and slightly cooled
- 1 cup packed light brown sugar
- ½ cup granulated sugar
- 2 large eggs, room temperature
- 2 teaspoons vanilla extract
- 2 cups chocolate chunks (not chips – buy a chocolate bar and chop it)
- Optional: flaky sea salt for topping
Special Equipment:
- Stand mixer or hand mixer
- Baking sheets
- Parchment paper or silicone mats
- Cookie scoop (3 tablespoon size for standard cookies)
- Sharp knife for chopping chocolate
Instructions
Step 1: The Chocolate Chunk Prep
First things first – if you’re using chocolate chips, stop. Go buy a good quality chocolate bar (or three). Dark chocolate, milk chocolate, semi-sweet – whatever you prefer, but it needs to be bar chocolate. Chop it into rough chunks, varying sizes from pea-sized to almond-sized. The irregular pieces create different melting patterns and pockets of molten chocolate. This is non-negotiable for bakery-style cookies.
Step 2: The Dry Mix
In a medium bowl, whisk together flour, baking soda, and salt. Whisk it well – you want the leavening and salt evenly distributed. Set this aside. This is the boring but necessary step.
Step 3: The Butter Situation
Melt your butter and let it cool for about 5 minutes. It should be melted but not hot – if it’s too hot, it’ll cook the eggs when you add them. Slightly warm or room temp melted butter is perfect. This is crucial for getting that thick, chewy texture. Cold butter makes cakey cookies. Melted butter makes chewy, dense cookies.
Step 4: The Sugar and Butter Marriage
In a large bowl (or your stand mixer bowl), combine the melted butter with both sugars. Mix on medium speed for about 2 minutes until it’s well combined and slightly lighter in color. It won’t get fluffy like creamed butter and sugar – that’s normal. You’re creating a smooth, thick mixture. The brown sugar is what gives these cookies their chewiness and that deep, caramel-like flavor.
Step 5: The Eggs and Vanilla
Add eggs one at a time, beating well after each addition. Add the vanilla extract. Mix until everything is completely incorporated and the mixture is smooth and glossy. It should look almost like caramel at this point. If you see any streaks of egg, keep mixing.
Step 6: The Flour Addition (Don’t Screw This Up)
Add your dry ingredients all at once. Mix on LOW speed just until you don’t see any more flour streaks. DO NOT OVERMIX. The second you don’t see flour, stop. Overmixing develops gluten, which makes tough, cakey cookies instead of tender, chewy ones. If you have a few small flour streaks, that’s better than overmixing. They’ll incorporate when you add the chocolate.
Step 7: The Chocolate Chunk Integration
Add your chopped chocolate chunks. Fold them in with a spatula or mix on the lowest speed for just a few seconds. You want them evenly distributed but you’re not trying to pulverize them. Some will be on the surface – that’s perfect. Those surface chunks will create those gorgeous chocolate pools on top.
Step 8: The Chill (Most Important Step)
This is where most people mess up. Cover the dough and refrigerate for AT LEAST 2 hours, preferably overnight. This isn’t optional if you want thick cookies. Chilling the dough does several things: it solidifies the fat so the cookies don’t spread immediately, it allows the flour to fully hydrate, and it lets the flavors develop. Room temperature cookie dough = flat cookies. Cold cookie dough = thick cookies. Science.
Step 9: The Oven Prep
When you’re ready to bake, preheat your oven to 350°F (or 325°F if you have a convection oven). Line your baking sheets with parchment paper. Don’t skip the parchment – it prevents sticking and makes cleanup easy.
Step 10: The Portioning
Use a 3-tablespoon cookie scoop (or measure out about 3 tablespoons of dough per cookie). The dough will be firm from chilling – that’s perfect. Roll each portion into a ball, then here’s the key: slightly flatten the top while keeping the sides tall. You want a hockey puck shape, not a perfect sphere. This helps them bake up tall instead of round.
Step 11: The Spacing
Place 6 cookies per standard baking sheet. These spread, but not a ton. Still, give them room. If you crowd them, they’ll bake into one mega-cookie, and while that sounds fun, it’s actually disappointing.
Step 12: The Baking Process
Bake for 12-14 minutes. They should be golden brown around the edges but still look slightly underdone in the center. They’ll look puffy and soft. DO NOT OVERBAKE. Overbaked cookies are the enemy of thickness. The centers should look barely set – they’ll continue cooking on the hot pan after you remove them from the oven.
Step 13: The Pan Rest
When you remove the cookies from the oven, let them sit on the baking sheet for 5 minutes. This is crucial. They need to set up before you move them or they’ll fall apart. After 5 minutes, transfer them to a cooling rack. They’ll firm up as they cool but should stay soft and chewy in the middle.
Step 14: The Salt Situation (Optional But Amazing)
While the cookies are still warm, sprinkle a tiny pinch of flaky sea salt on top of each one. The salt enhances the sweetness and the chocolate flavor. It’s the difference between good cookies and cookies that make people ask for the recipe.
Step 15: The Eating
Wait until they’re warm but not hot – about 10 minutes out of the oven. Pick one up and notice the thickness. Break it in half and see that soft, chewy interior with melted chocolate chunks. Take a bite and experience the textural contrast – crispy edges, soft center, molten chocolate. This is what cookies are supposed to be.
Notes
Chill the Dough, Seriously: I can’t stress this enough. Room temp dough = flat cookies. Every time. No exceptions.
Use Brown Sugar: The molasses in brown sugar creates chewiness. Don’t substitute all white sugar unless you want crispy cookies.
Chocolate Chunks, Not Chips: Chips have stabilizers that prevent melting. Chopped bar chocolate melts into beautiful pools.
Don’t Overbake: They should look slightly underdone when you pull them out. Trust the process.
Room Temperature Eggs: Cold eggs don’t incorporate as well. Let them sit out for 30 minutes before using.
- Prep Time: 15 minutes
- Cook Time: 12-14 minutes
Nutrition
- Calories: ~220 kcal
- Fat: ~11g
- Carbohydrates: ~29g
- Protein: ~3g


