
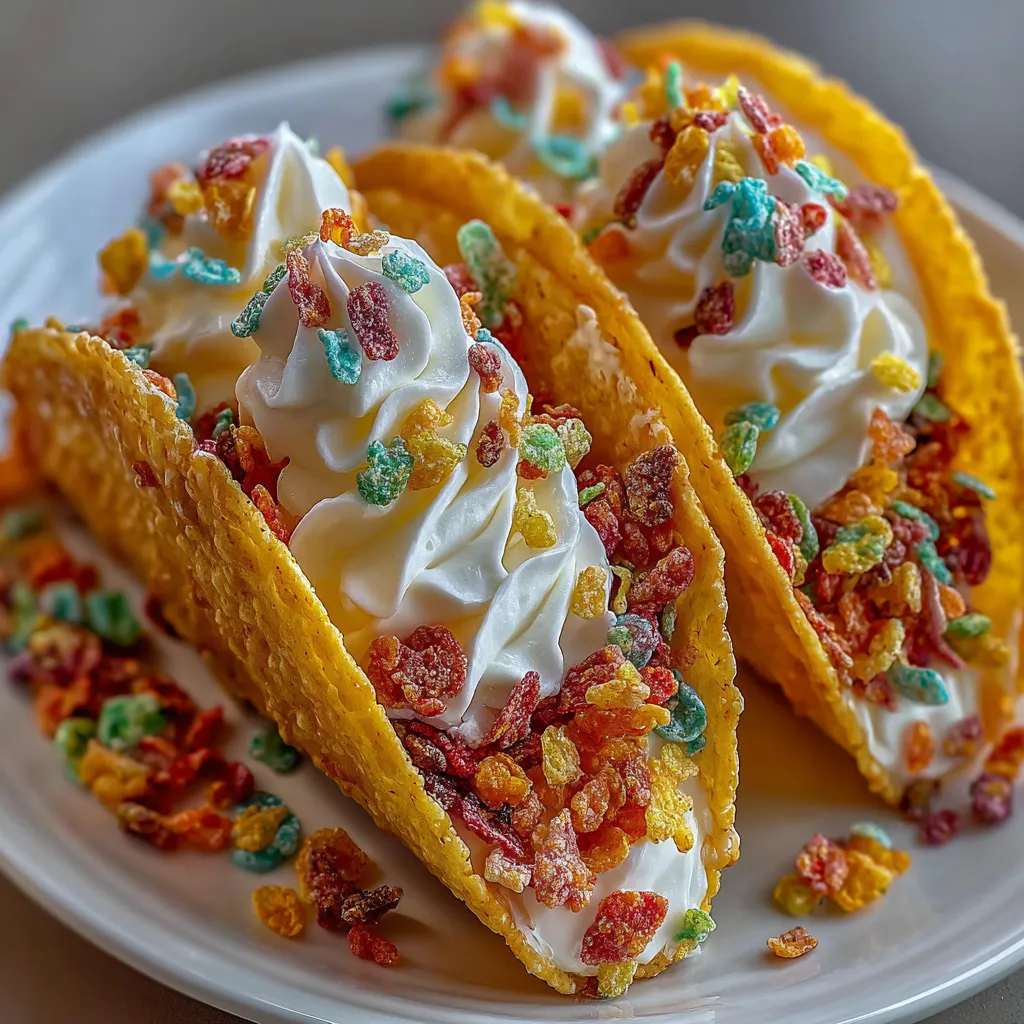
Okay, buckle up because I’m about to introduce you to the dessert that makes people stop mid-conversation and say “wait, WHAT?” Fruity Pebbles Cheesecake Tacos are exactly what they sound like and so much more — crunchy taco shells made from Fruity Pebbles cereal and white chocolate, filled with a no-bake cheesecake filling that’s creamy and dreamy, then topped with whipped cream, more cereal, and whatever other chaos you want to add. They’re colorful, they’re ridiculous, they’re Instagram bait, and they taste like childhood had a party with a fancy dessert. I made these for my niece’s birthday and the adults were more obsessed than the kids. My brother-in-law ate five and then asked if I could make them for his birthday too. He’s 37. That’s the kind of power these have.
Why You’ll Love This Recipe
No baking required. Well, except for shaping the shells. But no actual oven time for the filling.
Insanely fun to make. Seriously, this is a project that makes you feel like a dessert genius.
Kid-approved, adult-obsessed. Everyone loses their mind over these, regardless of age.
Customizable to the max. Change up the cereal, the filling, the toppings — make it yours.
Party showstopper. These get more reactions than any fancy cake ever could.
Easier than you think. Looks complicated, actually pretty straightforward once you get going.
The Good Stuff You’ll Need
For the Fruity Pebbles Taco Shells:
- 3 cups Fruity Pebbles cereal
- 12 oz white chocolate chips (good quality melts better)
- 2 tbsp coconut oil or vegetable oil
- Pinch of salt
For the Cheesecake Filling:
- 8 oz (one block) cream cheese, softened to room temp (don’t skip this)
- 1/4 cup powdered sugar
- 1 tsp vanilla extract
- 1 cup heavy whipping cream, cold
- 2 tbsp powdered sugar (for the whipped cream)
- Optional: 2-3 drops food coloring to make it fun
For the Toppings (go wild):
- Extra Fruity Pebbles
- Whipped cream or Cool Whip
- Rainbow sprinkles
- Mini marshmallows
- Fresh berries (strawberries, raspberries, blueberries)
- Chocolate sauce or caramel drizzle
- Mini chocolate chips
- Edible glitter (because why not)
For Assembly:
- Taco holder or a muffin tin turned upside down (for shaping)
- Parchment paper
- Piping bag or ziplock bag for filling
Let’s Do This
Step 1: Prep Your Workspace
Line a baking sheet with parchment paper.
Set up your taco shell shaping station. You can use a taco holder, or flip a muffin tin upside down and drape the shells over the humps, or use drinking glasses, or even a rolling pin propped up. Get creative.
Lightly spray your shaping surface with cooking spray so the shells don’t stick.
Step 2: Make the Fruity Pebbles Shells
In a microwave-safe bowl, combine white chocolate chips and coconut oil.
Microwave in 30-second intervals, stirring between each, until completely melted and smooth. Don’t rush this or you’ll burn the chocolate. Usually takes 2-3 intervals.
Add a pinch of salt to balance the sweetness.
Pour the Fruity Pebbles into the melted white chocolate and stir gently until every piece is coated. Work quickly before it starts to set.
Step 3: Shape Those Taco Shells
Working quickly (seriously, this stuff sets fast), scoop about 1/3 cup of the cereal mixture onto your parchment-lined baking sheet.
Use the back of a spoon or your hands (slightly wet helps prevent sticking) to press it into a circle about 5-6 inches in diameter and about 1/4 inch thick.
Immediately drape it over your taco shaping device while it’s still pliable. Gently press to create the taco shell shape.
Hold it in place for 30-60 seconds until it starts to firm up enough to hold its shape.
Repeat with remaining mixture. You should get 6-8 taco shells depending on size.
Step 4: Let Them Set
Let the shells sit at room temperature for 30-60 minutes to fully harden. Or speed things up by popping them in the fridge for 15-20 minutes.
Don’t try to remove them from the shaping device until they’re completely firm or they’ll crack and break your heart.
Once set, carefully remove from the molds. They should be sturdy and crunchy.
Step 5: Make the Cheesecake Filling
In a large bowl or stand mixer, beat the softened cream cheese until smooth and fluffy, about 2-3 minutes. No lumps allowed.
Add 1/4 cup powdered sugar and vanilla extract. Beat until well combined and smooth.
In a separate bowl, whip the cold heavy cream with 2 tablespoons powdered sugar until stiff peaks form. This takes 3-4 minutes on high speed.
Gently fold the whipped cream into the cream cheese mixture in three additions. Fold carefully to keep it light and fluffy, not dense.
If you want colored filling, add a few drops of food coloring and fold until evenly distributed.
Transfer the filling to a piping bag or a large ziplock bag with the corner cut off. This makes filling the tacos way easier.
Step 6: Chill the Filling
Refrigerate the filling for at least 30 minutes before assembling. This helps it firm up and makes piping easier.
You can make this filling a day ahead and keep it covered in the fridge. Just give it a quick stir before piping.
Step 7: Assemble Your Tacos
Right before serving (don’t do this too far in advance or the shells get soggy), pipe the cheesecake filling into each taco shell.
Fill them generously but don’t overstuff or they’ll be hard to eat.
Top with a dollop of whipped cream or Cool Whip.
Sprinkle with extra Fruity Pebbles, rainbow sprinkles, mini marshmallows, whatever your heart desires.
Add fresh berries for a pop of color and to pretend these are healthy (they’re not, but the berries help).
Drizzle with chocolate or caramel sauce if you’re feeling extra.
Step 8: Serve Immediately
These are best eaten fresh after assembly. The shells stay crunchy and the filling stays cold and creamy.
Serve on a colorful platter for maximum visual impact.
Watch people lose their absolute minds.
Take approximately 47 photos for Instagram before anyone is allowed to eat them.
Serving Suggestions
Serve at birthday parties, baby showers, or any celebration that needs a wow factor.
Make a dessert taco bar with different fillings and toppings and let people customize their own.
Pair with glasses of milk for the full nostalgic cereal experience.
Serve on individual plates with extra toppings on the side for a fancy presentation.
Make mini versions using less mixture per shell for bite-sized treats perfect for dessert tables.
Switch It Up
Different Cereals: Try Cocoa Pebbles, Lucky Charms, Cinnamon Toast Crunch, or Trix. Any colorful cereal works.
Chocolate Shells: Use milk chocolate or dark chocolate instead of white chocolate for the shells.
Cookies and Cream: Use crushed Oreos instead of Fruity Pebbles for the shells, add Oreo pieces to the filling.
S’mores Style: Use Golden Grahams for shells, add mini marshmallows to filling, drizzle with chocolate.
Strawberry Shortcake: Use strawberry cream cheese in the filling, top with fresh strawberries and graham cracker crumbs.
Peanut Butter Cup: Add peanut butter to the cream cheese filling, use Reese’s Puffs for the shells, top with peanut butter cups.
Funfetti: Add rainbow sprinkles to the filling, use Funfetti cake mix in the cream cheese layer.
Adult Version: Add 1-2 tablespoons of Baileys or Kahlua to the cheesecake filling (not for kids obviously).
Make-Ahead Tips
The taco shells can be made up to 3 days in advance and stored in an airtight container at room temperature. Keep them away from humidity or they’ll get sticky.
The cheesecake filling can be made 1-2 days ahead and stored covered in the fridge.
DO NOT assemble until right before serving. The filling will make the shells soggy if they sit too long. 30 minutes max before eating.
If traveling, transport shells and filling separately and assemble on-site.
Shells can be frozen for up to 1 month in an airtight container with parchment between layers. Thaw at room temp before filling.
Questions People Actually Ask
Q: My white chocolate seized up and got grainy. What happened?
A: Water got in it, or you overheated it. Use a clean, dry bowl and melt slowly in 30-second intervals. The coconut oil helps prevent seizing.
Q: Can I use milk chocolate instead?
A: You can, but white chocolate is sturdier and holds the cereal together better. Milk chocolate can be too soft.
Q: My shells cracked when I tried to shape them. Help?
A: You waited too long and they started hardening. Work FAST once the chocolate is mixed with cereal. Shape them immediately.
Q: Can I make these without the taco shape?
A: Sure! Press them into muffin cups for bowls, or make flat bars and stack the filling on top. The taco shape is just for fun.
Q: The filling is too runny. What did I do wrong?
A: Your cream cheese was too soft, or you didn’t whip the heavy cream to stiff peaks, or you stirred instead of folded. Chill it longer to firm it up.
Q: Can I use Cool Whip instead of making whipped cream?
A: You can fold Cool Whip into the cream cheese mixture, but homemade whipped cream tastes better and has better texture.
Q: These are too sweet for me.
A: Add a pinch of salt to the filling, use less powdered sugar, and top with fresh berries for tartness to balance the sweetness.
Q: Can I make these dairy-free?
A: Use dairy-free cream cheese and coconut whipped cream for the filling. The shells are already dairy-free if you use dairy-free white chocolate chips.
Q: How far in advance can I assemble these?
A: 30 minutes tops. Any longer and the shells get soggy. These are meant to be assembled fresh.
Q: My shells are too thick and hard to bite through.
A: You made them too thick. Aim for 1/4 inch or thinner. They should be crunchy but not rock-hard.
Fruity Pebbles Cheesecake Tacos
- Total Time: 1 hour 30 minutes
- Yield: 6–8 tacos 1x
Description
Okay, buckle up because I’m about to introduce you to the dessert that makes people stop mid-conversation and say “wait, WHAT?” Fruity Pebbles Cheesecake Tacos are exactly what they sound like and so much more — crunchy taco shells made from Fruity Pebbles cereal and white chocolate, filled with a no-bake cheesecake filling that’s creamy and dreamy, then topped with whipped cream, more cereal, and whatever other chaos you want to add. They’re colorful, they’re ridiculous, they’re Instagram bait, and they taste like childhood had a party with a fancy dessert. I made these for my niece’s birthday and the adults were more obsessed than the kids. My brother-in-law ate five and then asked if I could make them for his birthday too. He’s 37. That’s the kind of power these have.
Ingredients
For the Fruity Pebbles Taco Shells:
- 3 cups Fruity Pebbles cereal
- 12 oz white chocolate chips (good quality melts better)
- 2 tbsp coconut oil or vegetable oil
- Pinch of salt
For the Cheesecake Filling:
- 8 oz (one block) cream cheese, softened to room temp (don’t skip this)
- 1/4 cup powdered sugar
- 1 tsp vanilla extract
- 1 cup heavy whipping cream, cold
- 2 tbsp powdered sugar (for the whipped cream)
- Optional: 2-3 drops food coloring to make it fun
For the Toppings (go wild):
- Extra Fruity Pebbles
- Whipped cream or Cool Whip
- Rainbow sprinkles
- Mini marshmallows
- Fresh berries (strawberries, raspberries, blueberries)
- Chocolate sauce or caramel drizzle
- Mini chocolate chips
- Edible glitter (because why not)
For Assembly:
- Taco holder or a muffin tin turned upside down (for shaping)
- Parchment paper
- Piping bag or ziplock bag for filling
Instructions
Line a baking sheet with parchment paper.
Set up your taco shell shaping station. You can use a taco holder, or flip a muffin tin upside down and drape the shells over the humps, or use drinking glasses, or even a rolling pin propped up. Get creative.
Lightly spray your shaping surface with cooking spray so the shells don’t stick.
In a microwave-safe bowl, combine white chocolate chips and coconut oil.
Microwave in 30-second intervals, stirring between each, until completely melted and smooth. Don’t rush this or you’ll burn the chocolate. Usually takes 2-3 intervals.
Add a pinch of salt to balance the sweetness.
Pour the Fruity Pebbles into the melted white chocolate and stir gently until every piece is coated. Work quickly before it starts to set.
Working quickly (seriously, this stuff sets fast), scoop about 1/3 cup of the cereal mixture onto your parchment-lined baking sheet.
Use the back of a spoon or your hands (slightly wet helps prevent sticking) to press it into a circle about 5-6 inches in diameter and about 1/4 inch thick.
Immediately drape it over your taco shaping device while it’s still pliable. Gently press to create the taco shell shape.
Hold it in place for 30-60 seconds until it starts to firm up enough to hold its shape.
Repeat with remaining mixture. You should get 6-8 taco shells depending on size.
Let the shells sit at room temperature for 30-60 minutes to fully harden. Or speed things up by popping them in the fridge for 15-20 minutes.
Don’t try to remove them from the shaping device until they’re completely firm or they’ll crack and break your heart.
Once set, carefully remove from the molds. They should be sturdy and crunchy.
In a large bowl or stand mixer, beat the softened cream cheese until smooth and fluffy, about 2-3 minutes. No lumps allowed.
Add 1/4 cup powdered sugar and vanilla extract. Beat until well combined and smooth.
In a separate bowl, whip the cold heavy cream with 2 tablespoons powdered sugar until stiff peaks form. This takes 3-4 minutes on high speed.
Gently fold the whipped cream into the cream cheese mixture in three additions. Fold carefully to keep it light and fluffy, not dense.
If you want colored filling, add a few drops of food coloring and fold until evenly distributed.
Transfer the filling to a piping bag or a large ziplock bag with the corner cut off. This makes filling the tacos way easier.
Refrigerate the filling for at least 30 minutes before assembling. This helps it firm up and makes piping easier.
You can make this filling a day ahead and keep it covered in the fridge. Just give it a quick stir before piping.
Right before serving (don’t do this too far in advance or the shells get soggy), pipe the cheesecake filling into each taco shell.
Fill them generously but don’t overstuff or they’ll be hard to eat.
Top with a dollop of whipped cream or Cool Whip.
Sprinkle with extra Fruity Pebbles, rainbow sprinkles, mini marshmallows, whatever your heart desires.
Add fresh berries for a pop of color and to pretend these are healthy (they’re not, but the berries help).
Drizzle with chocolate or caramel sauce if you’re feeling extra.
These are best eaten fresh after assembly. The shells stay crunchy and the filling stays cold and creamy.
Serve on a colorful platter for maximum visual impact.
Watch people lose their absolute minds.
Take approximately 47 photos for Instagram before anyone is allowed to eat them.
Notes
Serve at birthday parties, baby showers, or any celebration that needs a wow factor.
Make a dessert taco bar with different fillings and toppings and let people customize their own.
Pair with glasses of milk for the full nostalgic cereal experience.
Serve on individual plates with extra toppings on the side for a fancy presentation.
Make mini versions using less mixture per shell for bite-sized treats perfect for dessert tables.
- Prep Time: 30
Nutrition
- Calories: ~420 kcal
- Fat: ~28g
- Carbohydrates: ~42g
- Protein: ~5g


