
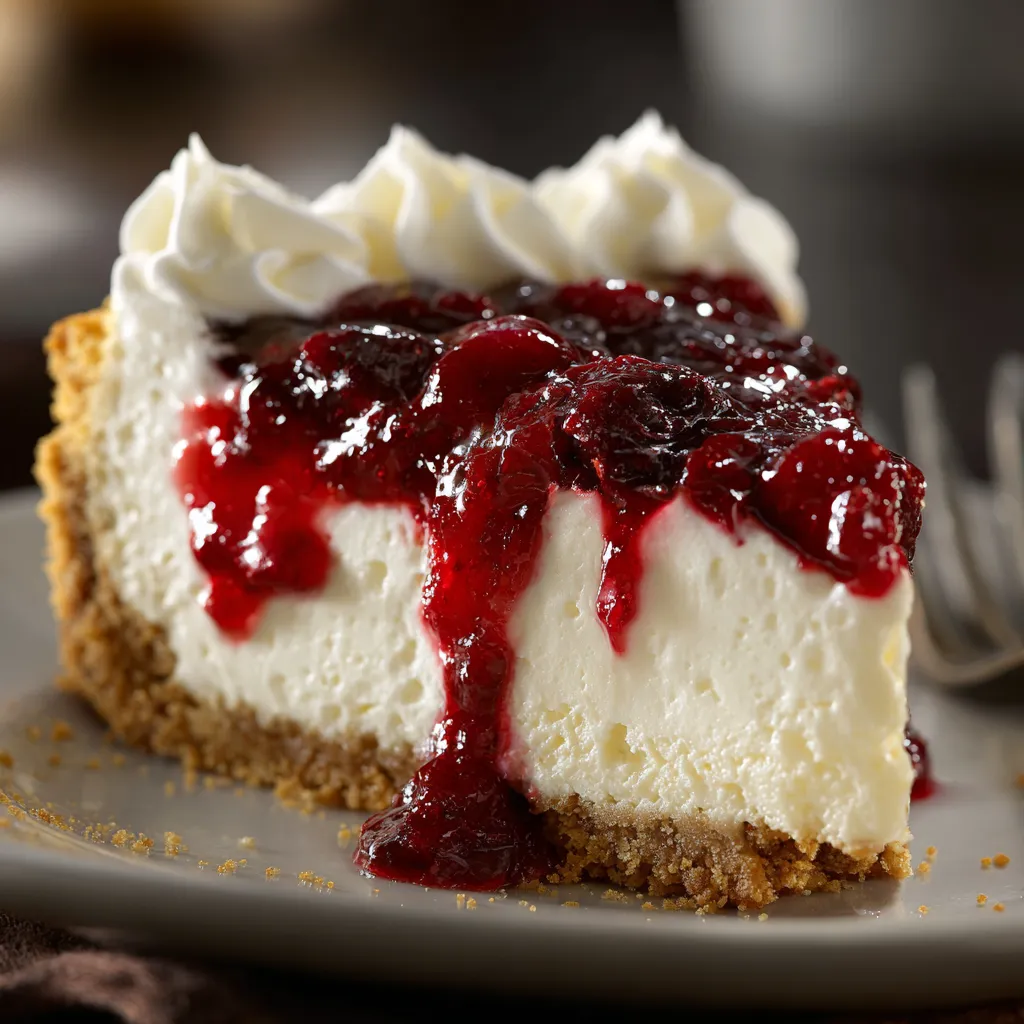
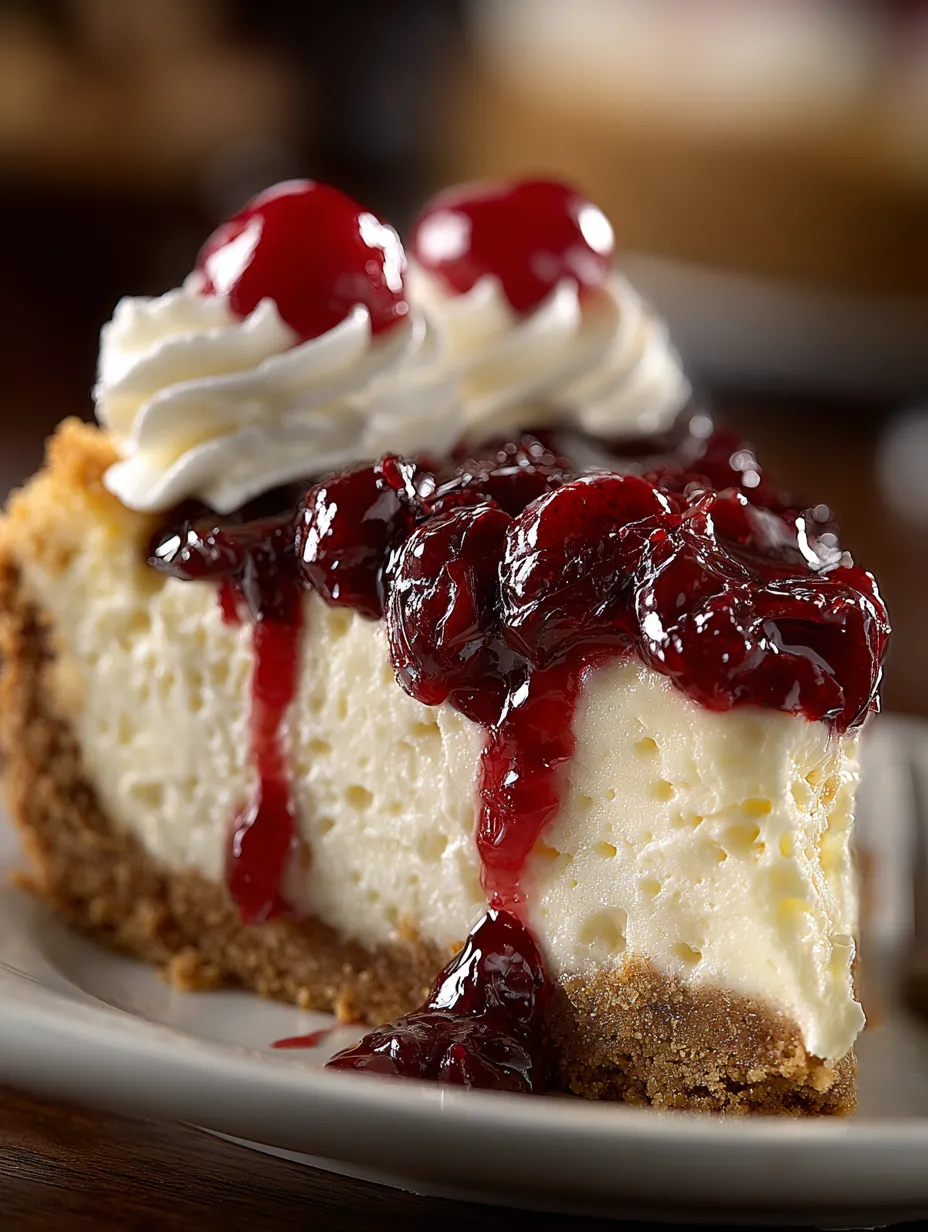
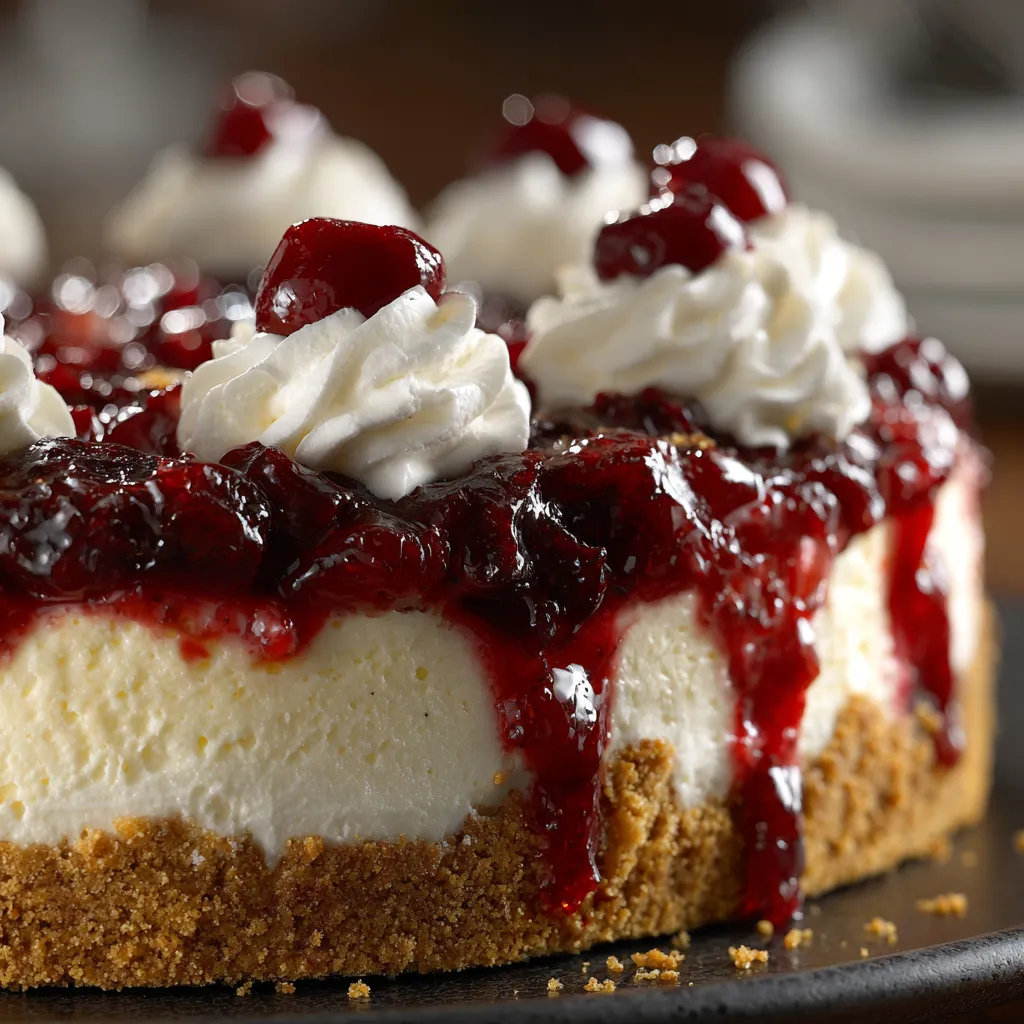
Okay, let’s talk about the dessert that makes people weak in the knees: Classic Cherry Cheesecake. We’re talking silky, rich, cream cheese heaven sitting on top of a buttery graham cracker crust, all topped with gorgeous, glossy cherry goodness that looks like it belongs in a fancy bakery window. This isn’t just dessert — this is an event. It’s the kind of showstopper that makes people forget their own names and ask for the recipe before they’ve even finished their first bite. Yeah, it takes a little patience (cheesecake waits for no one), but trust me, the payoff is so worth it.
Why You’ll Love This Recipe
It’s that restaurant-quality dessert you can totally nail at home.
Looks fancy AF but uses simple ingredients you can find anywhere.
Make it a day ahead — less stress, better flavor.
Feeds a crowd and everyone will think you’re a dessert wizard.
No weird techniques or fancy equipment needed.
Freezes beautifully for future celebrations (or Tuesday cravings).
The Good Stuff You’ll Need
For the Crust:
1 1/2 cups graham cracker crumbs (about 12 crackers)
1/4 cup granulated sugar
6 tbsp butter, melted
Pinch of salt
For the Cheesecake Filling:
32 oz (4 packages) cream cheese, room temperature (this is KEY!)
1 cup granulated sugar
4 large eggs, room temperature
1/3 cup sour cream
1/4 cup heavy cream
2 tsp vanilla extract
1 tbsp cornstarch (trust me on this)
For the Cherry Topping:
1 can (21 oz) cherry pie filling
OR make your own: 2 cups fresh or frozen cherries, pitted
1/2 cup sugar
2 tbsp cornstarch
1 tbsp lemon juice
1/4 cup water
For Assembly:
Whipped cream (optional but recommended)
Fresh mint leaves for garnish
Let’s Make Magic Happen
Step 1: Prep Like a Pro
Preheat oven to 325°F.
Wrap the outside of a 9-inch springform pan with heavy-duty foil (we’re preventing leaks, people).
Grease the inside of the pan.
Step 2: Crust Game Strong
Mix graham cracker crumbs, sugar, melted butter, and salt until it looks like wet sand.
Press firmly into the bottom of your prepared pan. Use the bottom of a measuring cup to really pack it down.
Bake for 10 minutes. Set aside to cool.
Step 3: The Star of the Show
Beat cream cheese with an electric mixer until smooth and fluffy (about 3 minutes). Scrape down sides.
Gradually add sugar, beating until combined.
Add eggs one at a time, beating just until incorporated after each. Don’t overmix!
Mix in sour cream, heavy cream, vanilla, and cornstarch until smooth.
Step 4: Water Bath Magic
Pour filling over the crust and smooth the top.
Place springform pan in a larger roasting pan. Pour hot water into the roasting pan until it comes halfway up the sides of the springform pan.
Bake for 55-65 minutes until center is almost set (it should still jiggle slightly).
Step 5: Cool Your Jets
Turn off oven and crack the door open. Let cheesecake cool in oven for 1 hour.
Remove from water bath and run a knife around the edge to prevent cracks.
Cool completely at room temperature, then refrigerate at least 4 hours (overnight is better).
Step 6: Cherry on Top
If using canned pie filling, you’re done! Just spoon it on top before serving.
For homemade: Combine cherries, sugar, cornstarch, lemon juice, and water in a saucepan. Cook over medium heat, stirring constantly, until thickened (about 5 minutes). Cool completely.
Step 7: The Grand Finale
Remove sides of springform pan.
Top with cherry topping, leaving a border around the edge.
Slice with a clean, warm knife (run it under hot water between cuts).
Serve with whipped cream and mint if you’re feeling fancy.
Serving Suggestions
Let it come to room temperature for 15 minutes before serving for the best texture.
A dollop of whipped cream never hurt anybody.
Pair with coffee or a dessert wine for the full experience.
Switch It Up
Strawberry Dreams: Use strawberry pie filling or fresh strawberry compote.
Chocolate Lovers: Add 1/4 cup cocoa powder to the filling and use chocolate graham crackers.
Lemon Zest: Add lemon zest to the filling and top with lemon curd.
Oreo Madness: Use crushed Oreos for the crust instead of graham crackers.
Mini Version: Make individual cheesecakes in a muffin tin (reduce baking time to 18-22 minutes).
Make-Ahead Tips
This actually tastes better after sitting overnight — flavors meld and texture perfects.
Can be made up to 3 days ahead. Just add the cherry topping before serving.
Freezes beautifully for up to 2 months. Thaw overnight in the fridge.
The crust can be made and baked days ahead. Just wrap tightly.
Questions People Actually Ask
Q: Why is my cheesecake cracked? A: Usually from overbaking or cooling too quickly. The water bath and gradual cooling help prevent this.
Q: Can I skip the water bath? A: You can, but you might get cracks and a denser texture. The water bath keeps it creamy.
Q: How do I know when it’s done? A: The center should still jiggle slightly when you shake the pan. It’ll set as it cools.
Q: Can I use low-fat cream cheese? A: Not recommended — you’ll lose that rich, creamy texture that makes cheesecake amazing.
Q: Why does my cheesecake have a weird texture? A: Probably overmixed or ingredients weren’t at room temperature. Cold ingredients don’t blend smoothly.
Q: Can I make this without a springform pan? A: Technically yes, but good luck getting it out in one piece. The springform pan is worth the investment.
PrintClassic Cherry Cheesecake
- Total Time: 1 hour 35 minutes
- Yield: 12 1x
Description
Okay, let’s talk about the dessert that makes people weak in the knees: Classic Cherry Cheesecake. We’re talking silky, rich, cream cheese heaven sitting on top of a buttery graham cracker crust, all topped with gorgeous, glossy cherry goodness that looks like it belongs in a fancy bakery window. This isn’t just dessert — this is an event. It’s the kind of showstopper that makes people forget their own names and ask for the recipe before they’ve even finished their first bite. Yeah, it takes a little patience (cheesecake waits for no one), but trust me, the payoff is so worth it.
Ingredients
For the Crust:
1 1/2 cups graham cracker crumbs (about 12 crackers)
1/4 cup granulated sugar
6 tbsp butter, melted
Pinch of salt
For the Cheesecake Filling:
32 oz (4 packages) cream cheese, room temperature (this is KEY!)
1 cup granulated sugar
4 large eggs, room temperature
1/3 cup sour cream
1/4 cup heavy cream
2 tsp vanilla extract
1 tbsp cornstarch (trust me on this)
For the Cherry Topping:
1 can (21 oz) cherry pie filling
OR make your own: 2 cups fresh or frozen cherries, pitted
1/2 cup sugar
2 tbsp cornstarch
1 tbsp lemon juice
1/4 cup water
For Assembly:
Whipped cream (optional but recommended)
Fresh mint leaves for garnish
Instructions
Preheat oven to 325°F.
Wrap the outside of a 9-inch springform pan with heavy-duty foil (we’re preventing leaks, people).
Grease the inside of the pan.
Mix graham cracker crumbs, sugar, melted butter, and salt until it looks like wet sand.
Press firmly into the bottom of your prepared pan. Use the bottom of a measuring cup to really pack it down.
Bake for 10 minutes. Set aside to cool.
Beat cream cheese with an electric mixer until smooth and fluffy (about 3 minutes). Scrape down sides.
Gradually add sugar, beating until combined.
Add eggs one at a time, beating just until incorporated after each. Don’t overmix!
Mix in sour cream, heavy cream, vanilla, and cornstarch until smooth.
Pour filling over the crust and smooth the top.
Place springform pan in a larger roasting pan. Pour hot water into the roasting pan until it comes halfway up the sides of the springform pan.
Bake for 55-65 minutes until center is almost set (it should still jiggle slightly).
Turn off oven and crack the door open. Let cheesecake cool in oven for 1 hour.
Remove from water bath and run a knife around the edge to prevent cracks.
Cool completely at room temperature, then refrigerate at least 4 hours (overnight is better).
If using canned pie filling, you’re done! Just spoon it on top before serving.
For homemade: Combine cherries, sugar, cornstarch, lemon juice, and water in a saucepan. Cook over medium heat, stirring constantly, until thickened (about 5 minutes). Cool completely.
Remove sides of springform pan.
Top with cherry topping, leaving a border around the edge.
Slice with a clean, warm knife (run it under hot water between cuts).
Serve with whipped cream and mint if you’re feeling fancy.
Notes
Let it come to room temperature for 15 minutes before serving for the best texture.
A dollop of whipped cream never hurt anybody.
Pair with coffee or a dessert wine for the full experience.
- Prep Time: 30 minutes
- Cook Time: 65 minutes
Nutrition
- Calories: ~420 kcal
- Carbohydrates: ~38g
- Protein: ~8g


