
What the heck is this?
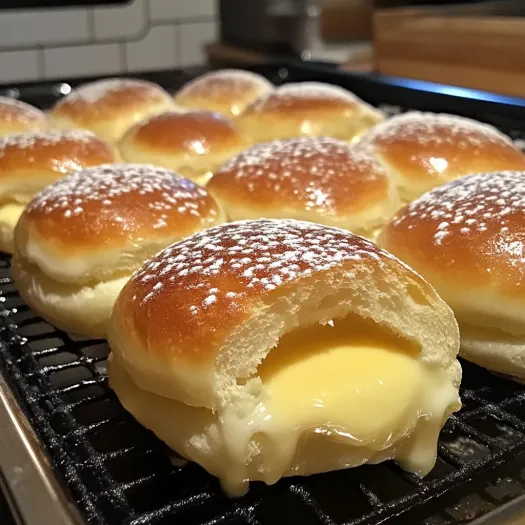
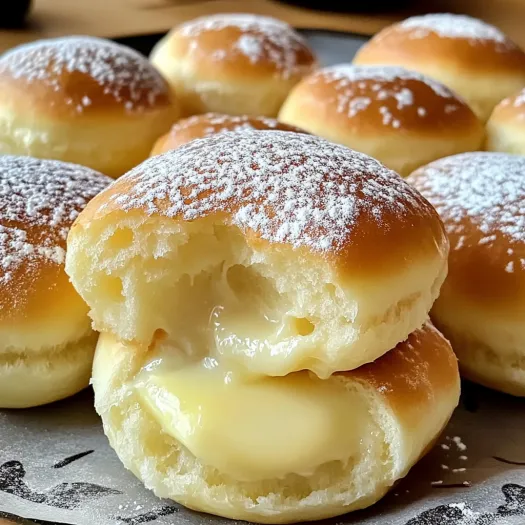
Alright, let’s talk about comfort food with a twist. These stovetop custard cream buns are a game-changer. Fluffy, warm buns filled with rich, velvety custard cream—think of them as a soft, gooey hug in a bun. And guess what? You don’t need an oven to make them. No fancy equipment, no waiting forever for things to rise. Just a stovetop, some basic ingredients, and a little time. These buns are perfect for a cozy weekend treat, a dessert, or whenever you want to impress someone with your baking skills without all the effort. Seriously, they’re that easy.
Why You’ll Love This Recipe
- No Oven Required: These buns are made entirely on the stovetop. If you don’t have an oven or just don’t want to use it, this recipe is perfect.
- Quick & Easy: From start to finish in about 45 minutes. You won’t believe how simple it is to make these.
- Super Soft & Fluffy: The texture of these buns is next-level. Soft, pillowy, and perfect for soaking up the custard cream.
- Creamy Custard Filling: The homemade custard cream is rich, smooth, and has the perfect sweetness. The real star of the show.
- Versatile: Great for breakfast, dessert, or a sweet afternoon snack with your tea or coffee.
The Good Stuff You’ll Need
For the Buns:
- 1 1/2 cups all-purpose flour
- 1/2 cup warm milk
- 2 tbsp sugar
- 1 tbsp instant yeast
- 1/2 tsp salt
- 2 tbsp unsalted butter, melted
- 1/4 tsp vanilla extract
- 1 egg (for brushing)
For the Custard Cream Filling:
- 1 cup whole milk
- 2 tbsp sugar
- 2 tbsp cornstarch
- 1 egg yolk
- 1/2 tsp vanilla extract
- Pinch of salt
For Cooking:
- 1-2 tbsp butter (for greasing the pan)
Let’s Do This
Step 1: Prepare the Buns Dough
In a mixing bowl, combine the warm milk, sugar, and yeast. Let it sit for about 5-10 minutes until it becomes frothy.
Once the yeast is activated, add the flour, salt, melted butter, and vanilla extract to the bowl. Mix everything together to form a dough. Knead the dough for 5-8 minutes until it’s smooth and elastic.
Cover the dough with a damp towel and let it rise for about 30 minutes, or until it has doubled in size.
Step 2: Make the Custard Cream
While your dough is rising, prepare the custard cream filling. In a saucepan, whisk together the milk, sugar, cornstarch, egg yolk, and a pinch of salt. Place the mixture over medium heat and stir constantly until it thickens, about 4-5 minutes.
Once the custard has thickened, remove from heat and stir in the vanilla extract. Let it cool to room temperature before using it to fill the buns.
Step 3: Shape the Buns
Once the dough has risen, punch it down to release the air. Roll the dough out onto a lightly floured surface into a rectangular shape, about 1/2 inch thick.
Cut the dough into 6-8 squares or circles (depending on how large you want your buns). Place a spoonful of cooled custard cream in the center of each piece. Carefully fold the edges of the dough over the custard, sealing it tightly.
Step 4: Cook the Buns
Heat a non-stick skillet or pan over low to medium-low heat and grease it with butter. Place the buns seam-side down in the pan, ensuring they are spaced out and not touching.
Cover the pan with a lid and let the buns cook for 12-15 minutes, until golden brown on the bottom. Flip the buns carefully and cook for another 5-8 minutes until the other side is golden brown.
Step 5: Finish and Serve
Brush the tops of the buns with a little melted butter for an extra golden shine. Let them cool slightly before serving.
Serve warm, and enjoy the soft, fluffy buns filled with the creamy, dreamy custard filling.
Serving Suggestions
- Serve with a cup of tea or coffee for the ultimate snack combo.
- Drizzle some chocolate syrup over the top for a decadent twist.
- Sprinkle powdered sugar or cinnamon for a festive touch.
Switch It Up
- Chocolate Custard: Add some melted chocolate to the custard mixture for a chocolate version of these buns.
- Fruit Filling: Use fruit preserves or jam as the filling instead of custard cream for a fruity variation.
- Vegan Version: Swap the butter with vegan butter, and use a plant-based milk and egg substitute for the custard.
Make-Ahead Tips
- You can prepare the dough the night before. Just store it in the fridge to rise overnight.
- The custard cream can be made ahead and kept in the fridge for 1-2 days. Just warm it slightly before using.

Questions People Actually Ask
Q: Can I freeze these buns?
A: Yes! You can freeze the cooked buns. Just allow them to cool completely before freezing. Reheat them in a microwave or stovetop before serving.
Q: Can I use a different filling?
A: Absolutely! You can fill these buns with Nutella, cream cheese, or even a savory filling like ham and cheese.
Q: How do I know when the buns are cooked through?
A: The buns should be golden brown on both sides. If you’re unsure, gently press on the top of the buns. If they spring back, they’re done!
Stovetop Custard Cream Buns: Quick & Easy Recipe
- Total Time: 45 minutes
- Yield: 6–8 buns 1x
Description
Alright, let’s talk about comfort food with a twist. These stovetop custard cream buns are a game-changer. Fluffy, warm buns filled with rich, velvety custard cream—think of them as a soft, gooey hug in a bun. And guess what? You don’t need an oven to make them. No fancy equipment, no waiting forever for things to rise. Just a stovetop, some basic ingredients, and a little time. These buns are perfect for a cozy weekend treat, a dessert, or whenever you want to impress someone with your baking skills without all the effort. Seriously, they’re that easy.
Ingredients
For the Buns:
1 1/2 cups all-purpose flour
1/2 cup warm milk
2 tbsp sugar
1 tbsp instant yeast
1/2 tsp salt
2 tbsp unsalted butter, melted
1/4 tsp vanilla extract
1 egg (for brushing)
For the Custard Cream Filling:
1 cup whole milk
2 tbsp sugar
2 tbsp cornstarch
1 egg yolk
1/2 tsp vanilla extract
Pinch of salt
For Cooking:
1–2 tbsp butter (for greasing the pan)
Instructions
In a mixing bowl, combine the warm milk, sugar, and yeast. Let it sit for about 5-10 minutes until it becomes frothy.
Once the yeast is activated, add the flour, salt, melted butter, and vanilla extract to the bowl. Mix everything together to form a dough. Knead the dough for 5-8 minutes until it’s smooth and elastic.
Cover the dough with a damp towel and let it rise for about 30 minutes, or until it has doubled in size.
While your dough is rising, prepare the custard cream filling. In a saucepan, whisk together the milk, sugar, cornstarch, egg yolk, and a pinch of salt. Place the mixture over medium heat and stir constantly until it thickens, about 4-5 minutes.
Once the custard has thickened, remove from heat and stir in the vanilla extract. Let it cool to room temperature before using it to fill the buns.
Once the dough has risen, punch it down to release the air. Roll the dough out onto a lightly floured surface into a rectangular shape, about 1/2 inch thick.
Cut the dough into 6-8 squares or circles (depending on how large you want your buns). Place a spoonful of cooled custard cream in the center of each piece. Carefully fold the edges of the dough over the custard, sealing it tightly.
Heat a non-stick skillet or pan over low to medium-low heat and grease it with butter. Place the buns seam-side down in the pan, ensuring they are spaced out and not touching.
Cover the pan with a lid and let the buns cook for 12-15 minutes, until golden brown on the bottom. Flip the buns carefully and cook for another 5-8 minutes until the other side is golden brown.
Brush the tops of the buns with a little melted butter for an extra golden shine. Let them cool slightly before serving.
Serve warm, and enjoy the soft, fluffy buns filled with the creamy, dreamy custard filling.
Notes
Chocolate Custard: Add some melted chocolate to the custard mixture for a chocolate version of these buns.
Fruit Filling: Use fruit preserves or jam as the filling instead of custard cream for a fruity variation.
Vegan Version: Swap the butter with vegan butter, and use a plant-based milk and egg substitute for the custard.
- Prep Time: 15 minutes
- Cook Time: 30 minutes
Nutrition
- Calories: ~250 calories
- Protein: 6g


